ZOOM for Tutors
Make sure to see our mandatory ZOOM for Tutors training before your first lesson. In this training material, you will learn about how to:
- Add ZOOM to your profile
- Join your online lesson
- Microphone and Camera check
- Microphone and Camera check
- Share screen (and audio)
- Change view
- Use annotation tools
- Give control to students
- Use ZOOM Recording
- Leave the lesson
Add ZOOM to your profile
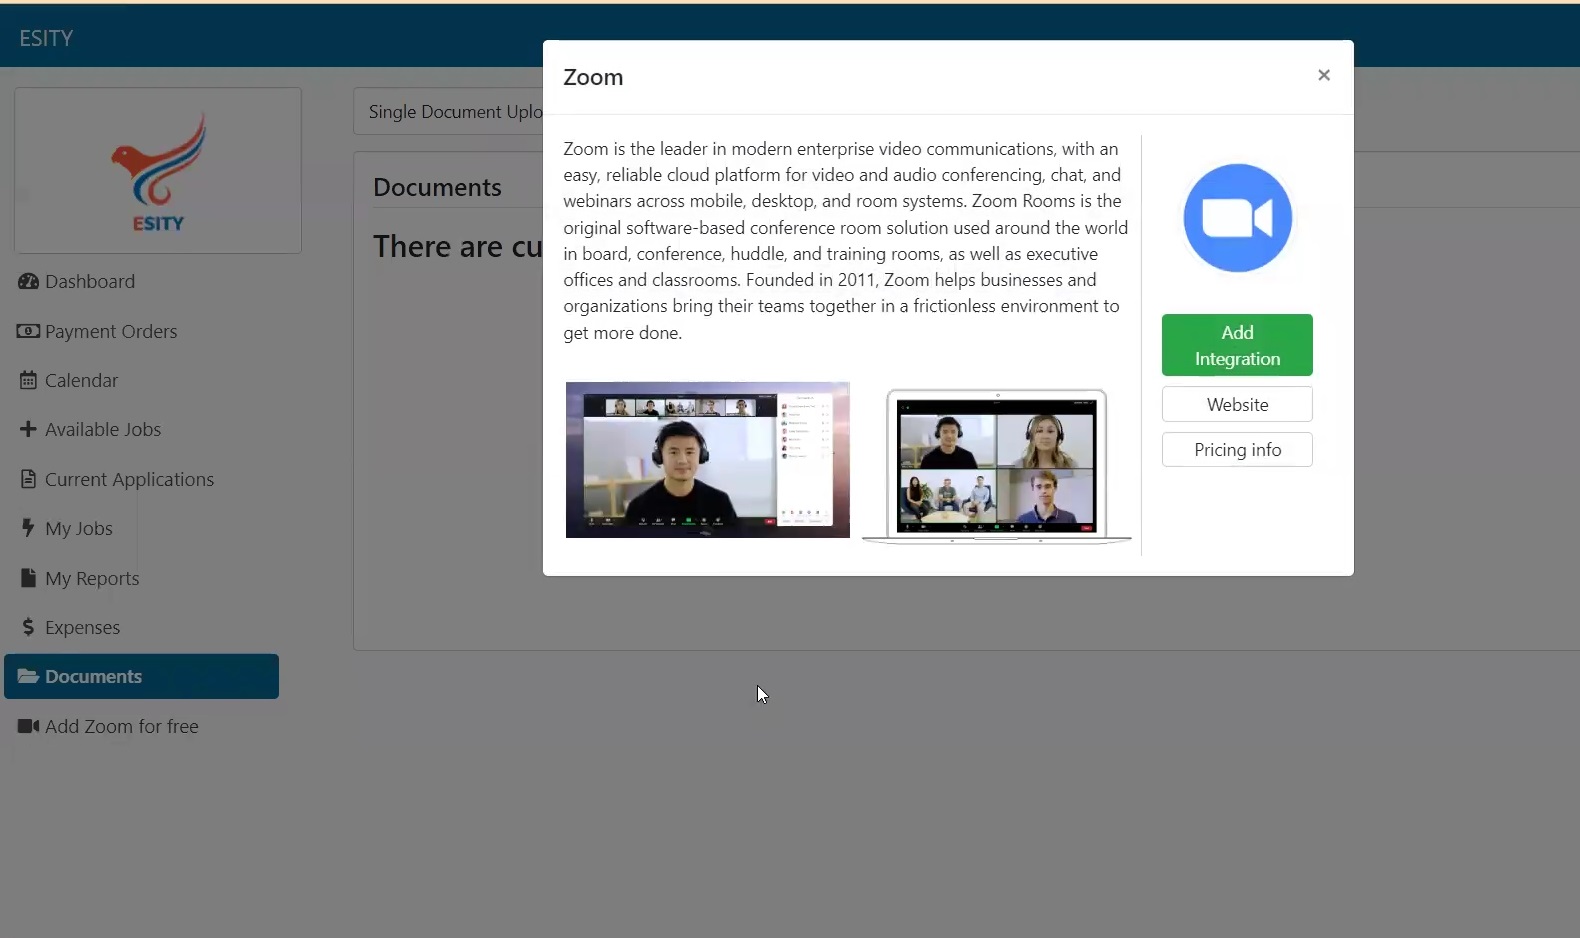
Click on Add ZOOM for free within your ESITY tutor system and choose Add integration. Sign in with your existing ZOOM account or create a new one.
- your Free ZOOM is used for - 25-minute lessons
- ESITY`s ZOOM is used for - 50-minute and longer lessons, Trial lessons
Free ZOOM room automatically turns off after 40 minutes. We don't require our tutors to have a paid ZOOM account, but if you have one, let us know and you can use it also for 50-minute and longer lessons.

How to join your online lesson
There are several ways how to join your online lesson. The most used ones are:
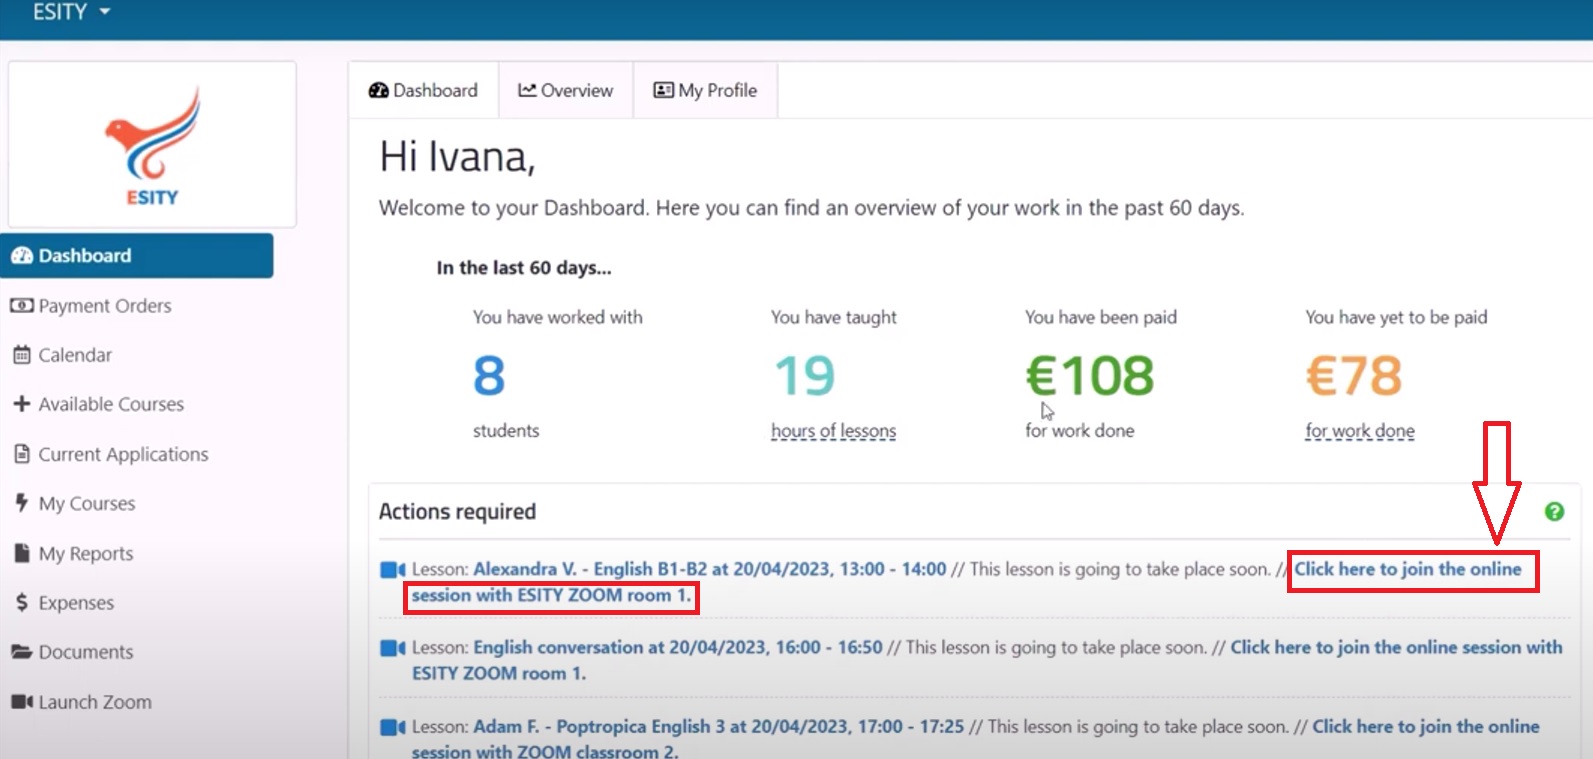
- Join online lesson from your ESITY dashboard - under Actions required, click on Click here to join the online session with ZOOM.

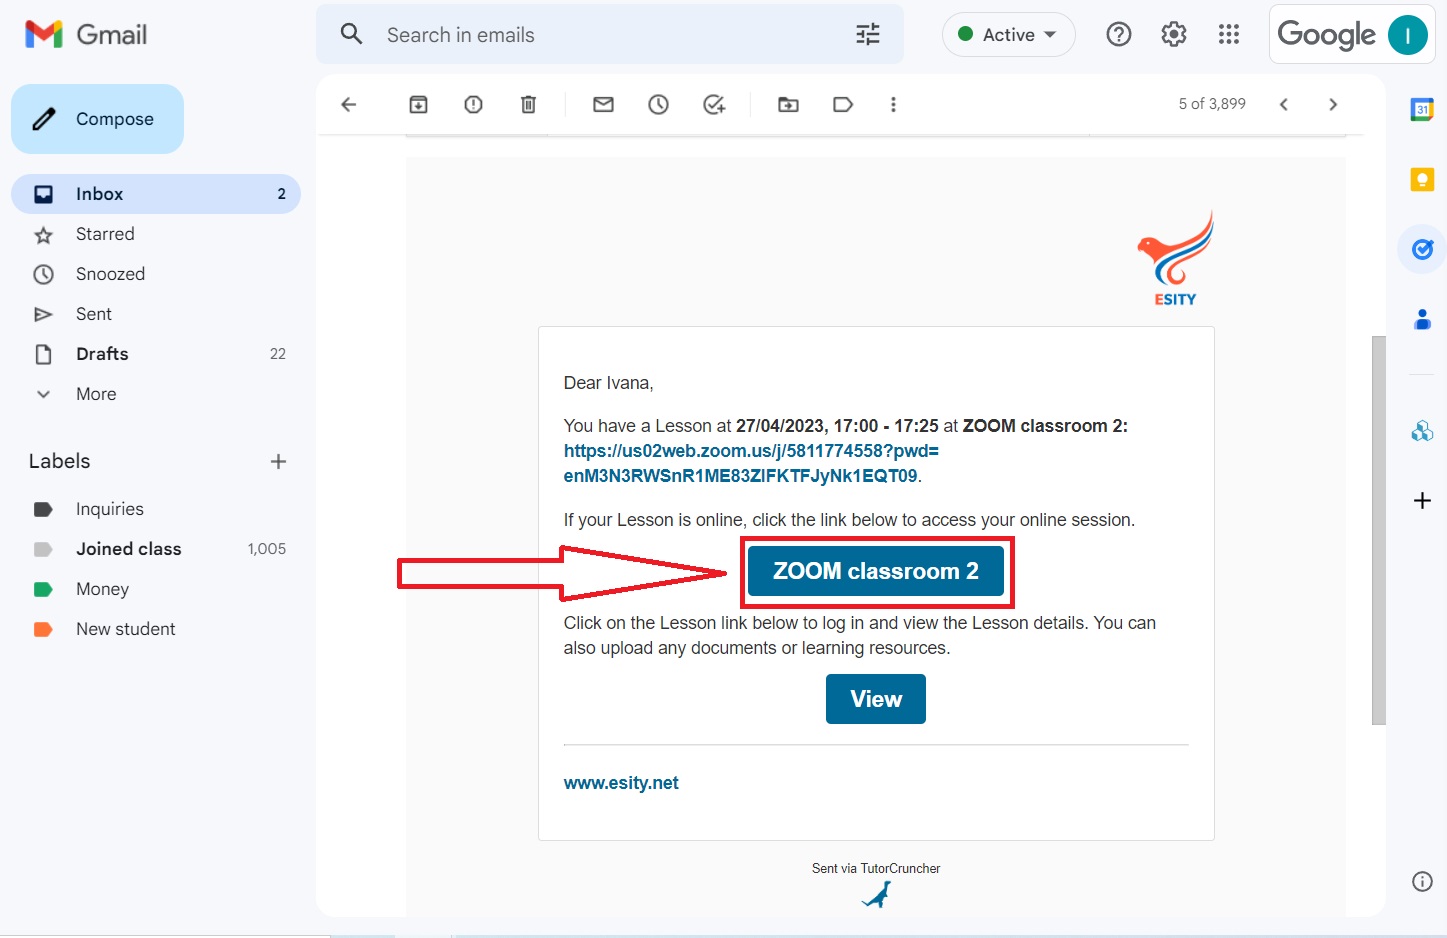
2. Join online lesson from email notification - you will get an email notification about upcoming lesson 24 hours before the lesson and 10 minutes before the lesson. Join the lesson by clicking on ZOOM button in the email.

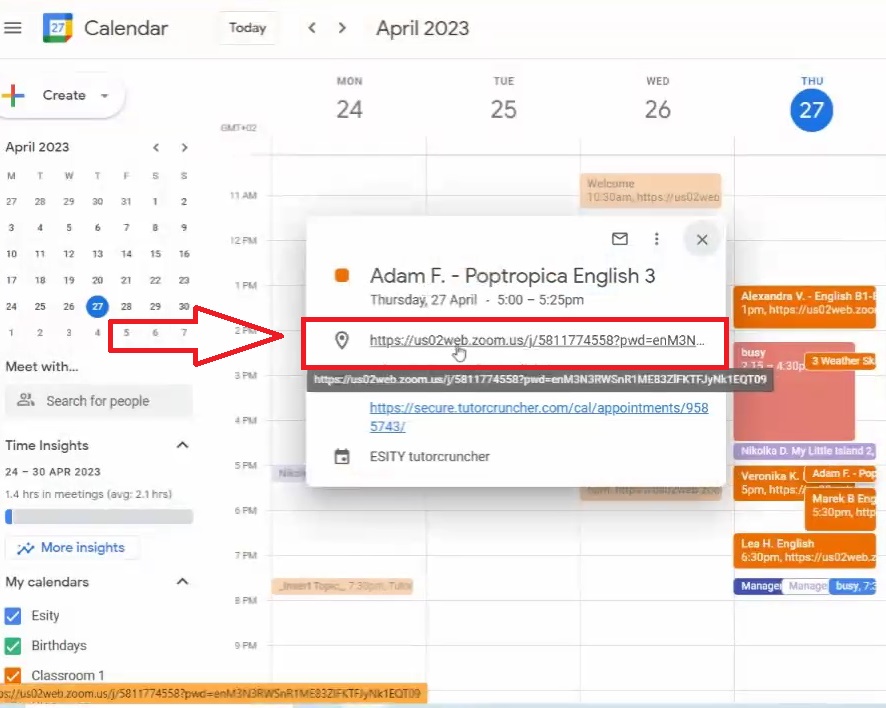
3. Join online lesson from your calendar - If you use Google calendar or iCal as your primary calendar, you can sync your calendar with your ESITY calendar and then join the lesson directly from that calendar.

Microphone and Camera check
If the microphone icon is showing a moving green color, it means that your microphone works well and the system transmits the sound.
You can MUTE your microphone by clicking on the microphone icon and then UNMUTE it the same way. You can use this up to 1 minute before the lesson should start so the student doesn't hear you during your lesson preparation.
If your microphone or speaker doesn't work, try this:
- click on the arrow next to the microphone icon and choose a different microphone or speaker, or
- click on the arrow next to the microphone icon and choose Test speaker and microphone
- try if your microphone or speakers work with other applications in your computer
- if nothing else works, restart your computer
You can STOP your camera by clicking on the camera icon and then START it the same way. You can use this up to 1 minute before the lesson should start so the student doesn't see you during your lesson preparation.
If your camera doesn't work, try this:
- click on the arrow next to the camera icon and choose a different camera, or
- click on the arrow next to the camera icon and choose Video Settings
- try if your camera works with other applications in your computer
- if nothing else works, restart your computer
Virtual backgrounds and filters
We strongly recommend using virtual backgrounds, filters and other ways for making your online classes more interesting and engaging mainly for children's courses. It is not mandatory, because free ZOOM account might not offer these options. You can set both virtual background and filter by clicking on the arrow next to the camera icon.
Virtual background
If you want to use a virtual background, use solid green-colored real background that covers the whole space seen on the camera. You can use solid green wall, green blanket or anything you can come up with.
We recommend using teaching-style backgrounds, or backgrounds that correspond with your lesson theme.
Video filters
Similar to backgrounds, video filters are mainly used for children's classes, but studio effects within these filters might work for you as well since you will never have to wear real make-up for your lessons :-)
Share screen (and audio)
Sharing screen is MANDATORY for all ESITY lessons. You teach all lessons by sharing screen with lesson materials on it. This way you are always "on the same page" with your students.
To share screen, click the green Share screen button. A pop-up window will appear where you can choose which screen or app you want to share. You can choose what you like, we usually use the whole screen since you may go from one window to another and use different programs during your class.
To share computer sound, click on the tick box on the left-down side of the pop-up window. If you forget to tick this, the student will not hear any sound that you turn on, like teaching materials audio or Youtube videos audio.
Change view
There is a different type of how you view yourself and others for adults and children up to 12 years.
Tutors and adult students:
Make sure you see both yourself and the student/students. You can do that by clicking on the two-box icon that appears when you hover over the camera video on your screen.
You can move your and your students video however you like, because it is only positioned for yourself. Student can choose his own view. That is why, sometimes your student might tell you that he doesn't see the teaching material, because it is "under" your camera videos. Simply explain them to move the camera videos somewhere else by dragging them with his mouse.
Children students up to 12 years:
Children generally need more vivid videos so they don't lose concentration. Therefore, we recommend using Side-by-side mode for children and also moving the "line" between the videos and shared screen to make the tutor's video much bigger. But, this is up to the parent to turn on at the beginning of each lesson.
If you want to help them, explain that they need to change this view by hovering the mouse at the top of their screen and click on the View options button that appears there. Then they click on the Side-by-side mode. However, you are not able to see how the student sees his screen and you cannot choose it for him.
Annotation tools
Annotation tools let you draw, write and colour your screen, as if you were drawing on the glass of your screen. They are used on almost every lesson both by teacher and students.
Tutors may use annotation tools to:
- showcase how to fill in the exercises by writing, matching
Children up to 6 years of age use tutor's annotation tools, so you need to share the control of your mouse, turn on the desired annotation tool and then the child can click anywhere on the shared screen with his mouse and draw.
All students above 6 years of age should use their own annotation tools.
Missing something? Let us know what we can add here.

